Your TMA Officers and Board of Directors
Support the TMA! ~ Traditional Muzzleloaders ~ The TMA is here for YOU!
*** JOIN in on the TMA 2024 POSTAL MATCH *** it's FREE for ALL !

For TMA related products, please check out the new TMA Store !

The Flintlock Paper

*** Folk Firearms Collective Videos ***


Author Topic: Lock disassembly  (Read 758 times)

Offline Chiefs50

  • TMA Forum Member
  • ***
  • Posts: 10
Lock disassembly
« on: August 29, 2009, 10:58:48 AM »
I have searched but been unable to come up with an answer.  My question is this.  Is there a definite sequence to disassembling a lock?  Mine is an L&R early flint.  I do have a TOTW mainspring vise.
No instructions came with the vise - are there any special tricks to using it?  

Mike

Offline pathfinder

  • TMA Forum Member
  • ***
  • Posts: 741
(No subject)
« Reply #1 on: August 29, 2009, 11:13:50 AM »
Put the cock on full cock,place vise on spring and tighten thumb screw just untill pressure is relived on the tumbler,then remove spring. Loosen cock screw slightly and gently tap screw head to loosen cock on tumbler,then finish removing scew and cock. Loosen screw on trigger spring and remove. the the rest of the brible screws and sear. Loosen and remove frizzen and frizzen spring. reverse the proccess to assemble.
NRA life member
NMLRA

Online Hank in WV

  • TMA Contributing Member
  • ***
  • Posts: 1995
  • TMA Member: Charter Member #65
(No subject)
« Reply #2 on: August 29, 2009, 12:33:10 PM »
Do pretty much as Pathfinder said except to tighten the vise on the mainspring just until it is snug. Then trip the sear bar and let the cock come forward. This will relieve all the pressure on the spring and allow it to be removed. Also be]very careful not to loose the fly. They can evaporate into thin air. I can't stress that enough.
Hank in WV
TMA Charter Member #65, exp 4/30/2026
"Much of the social history of the western world over the past three decades has involved replacing what worked with what sounded good. . ." Thomas Sowell

Offline Sir Michael

  • TMA Forum Member
  • ***
  • Posts: 2754
  • TMA: TMA Store
  • TMA Member: Charter Member #132
(No subject)
« Reply #3 on: August 29, 2009, 12:45:42 PM »
First off I would recommend you purchase a second spring vise or one of these for the frizzen.


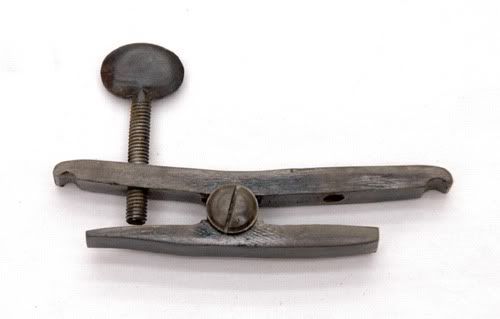
If you want one you can get them from Dixie.

My process is a bit different.

Move the hammer to full cock.
Close the frizzen.
Attach a spring vise to the frizzen spring and tighten just enough to take the pressure off the frizzen.
Remove the frizzen spring screw and frizzen spring and set aside (do not remove the vise).
Remove the frizzen screw and frizzen as set aside.
Attach a spring vise to the main spring tight enough so it does not fall off and slowly release the hammer (this will release the pressure on the spring so it can be removed).
(For locks with a link between the mainspring and tumbler this is when it is removed.)
Loosen the hammer screw (do not remove until latter).
Remove the sear spring screw and remove the sear spring.
Remove the rear bridle screw and sear.
Remove the front bridle screw and bridle.
(I'm not sure if your lock has a fly, if it does be careful not to loose it at this point.)
Remove the hammer screw.
Remove the hammer (this may require the use of hammer puller [a small gear puller will also work]
Remove the tumbler

Assembly is in reverse order.

NOTE:  Installing the sear spring requires loosely installing the sear and spring and then pressing them together until the spring slips into its index notch and then tightening the spring screw without releasing it.
:hairy
Sir Michael
Charter Member #132

Offline Chiefs50

  • TMA Forum Member
  • ***
  • Posts: 10
(No subject)
« Reply #4 on: August 30, 2009, 07:37:38 PM »
Thanks for the help guys.

Offline Gambia

  • TMA Forum Member
  • ***
  • Posts: 58
(No subject)
« Reply #5 on: August 30, 2009, 10:52:28 PM »
All of the above and always disassemble any mechanical device with small or easily damaged parts over a large piece of short nap carpet.It stops the parts bouncing all over and makes them easy to find .

Offline Chairslayer

  • TMA Forum Member
  • ***
  • Posts: 310
  • TMA: TMA Member # 239
  • TMA Member: Membership expires 3/27/ 2019
(No subject)
« Reply #6 on: August 31, 2009, 07:55:30 AM »
Quote from: "Charlie"
All of the above and always disassemble any mechanical device with small or easily damaged parts over a large piece of short nap carpet.It stops the parts bouncing all over and makes them easy to find .

Me too, except I use a white dish towel. The parts stand out against the white color
Dan Egener
TMA #239 Expires 3-14-2017
Learn from the mistakes of others, you'll never live long enough to make them all yourself.

Offline J.D.

  • TMA Forum Member
  • ***
  • Posts: 10
(No subject)
« Reply #7 on: August 31, 2009, 05:32:44 PM »
I can only add to NOT use the tumbler screw to knock the tumbler free of the cock. You will only sheer off the screw threads, or worse the threads in the tumbler, which will require replacement.

Use a flat punch of diameter of the hole in the cock, or a flat punch with a square  ground on the end.

IMHO, the best way to remove a cock from the tumble is by using a coupla wood blocks, or a large block with a hole large enough to accept the tumbler. Set the lock on the blocks with a shop towel, rag, or something underneath, to catch the fly. Using the square punch punch the tumbler axle free of the cock.

Use masking tape to secure the fly to whatever container the parts will be stored in while you are working on the lock. Wrap the end of the tape over the fly and use the loose end to tape it to the inside of the container. Otherwise, you will be asking for  advise on where to buy a new fly.

God bless