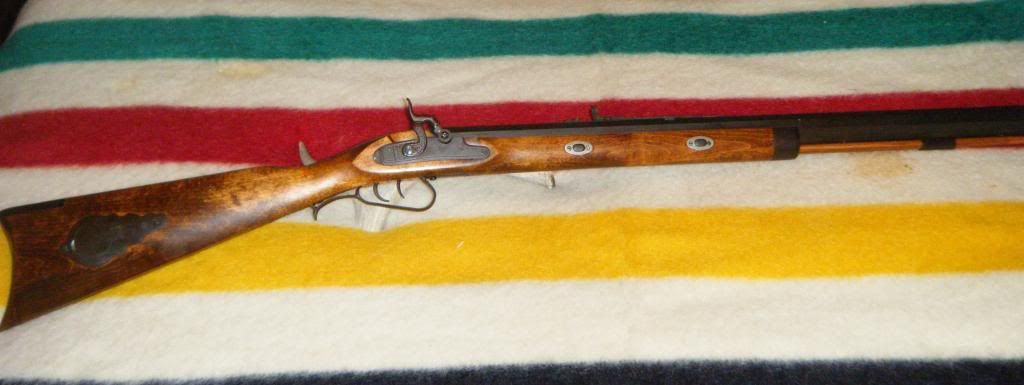
I finally replaced the lock on my Deer Creek version of the CVA Mountain Rifle. All the locks on my CVA rifles have given me trouble at one time or another and I knew sooner or latter this one would too. At the last rendezvous I attended it dropped the sear into the half cock notch on my last three shots. The fly had worn down and didn't allow the sear to slide past the half cock. This rifle has a very accurate shooting barrel and I like how it handles but it has to be reliable before I am comfortable hunting with it.
The lock plates on all my CVA rifles have a pointed tail but the Deer Creek lock is round. I hesitated to order the L&R lock because the tail on it is pointed. I wasn't sure it would work in the Deer Creek rifle. I copied the photo of the L&R lock from the Track of the Wolf catalogue, cut it out, and compared that to the lock plate from the rifle. It appeared it would work if I enlarged the inlet on the stock or filed the lock plate to match.
The new L&R lock arrived and it came with a very good booklet of instructions on how to fit it into the lock mortise. The back of the lock plate is marked with a line to follow if you want to file the plate round and remove the point. I did that and it is a perfect fit with no modification necessary to the mortise in the stock. That information is not given in the Track catalogue or on L&R 's web site. Had it been, I would have done this a year ago.
It wasn't difficult to fit the lock into the existing mortise. After dissembling the lock, I filed the lock plate to fit the mortise. The line indicated how much to remove to shape the tail. The plate is also slightly larger than the in-letting which gave me room to file a slight inward angle toward the back of the plate. That helps when removing and replacing the lock for cleaning and prevents chipping the edges of the mortise should the wood ever swell tight in that area.
The bolster on the lock plate needed to be filed down too so the lock plate would sit flush in the mortise while snugging up tight against the barrel. They left the bolster plenty wide enough for that. When I had the lock plate fitted correctly I reassembled the lock and marked the high spots on the internal parts with a cheap lipstick to show where it was contacting the wood inside the mortise. A very little bit of wood needed to be removed here. Again, the instruction booklet had good directions. I did need to file the sear arm a little to match it up with the trigger. There is plenty of metal there and the instructions indicate where to remove it. Yes there is some filing to do but that is intentional to give you a really good fit on everything. It is much easier to file away excess metal than to add metal.
At this point the lock fit properly into the mortise with no moving parts contacting wood. The hammer needed to be bent slightly to make it hit the nipple squarely. I removed it, heated it with a torch, and tweaked is slightly.
The sear arm is also extra long and thick. You will have to do some filing there as well and the instruction booklet indicates where and how to do that. This is a good thing and allows you to have a good fit between the sear and your trigger. You won't need to refit the in-letting on your triggers. I checked the function to be sure the lock operated correctly with the half cock and full cock notches and the set triggers functioned both ways. I needed to adjust the setting on the set trigger and file the sear arm a little more so the lock would cock into the half and full cock positions with the trigger set or unset. Then checked and double checked to be sure it all operated safely and correctly.
The geometry on the tumbler is good and the sear arm aligned to the same point in all three positions. It sits just about perfectly on the two trigger levers. Then I dissembled the lock, polished everything nice and smooth, and blued the outside of the lock plate and the hammer. It didn't take a lot of tools or talent to do any of this. The L&R lock is not a "drop in replacement part" but it isn't difficult or too daunting a job. Had I seen the instruction booklet or had the information I just wrote, I would have done this sooner.
I decided to make a few more upgrades and refinish the stock while I was working on this rifle. Who ever had the rifle before me had done a poor job of epoxy bedding the tang and the bedding was rather soft. I removed all that and did it right with acraglass. Then I striped the finish off the stock, removed that ugly router line CVA leaves around the cheek piece, and reshaped the nose of the comb. I used Laurel Mountain Forge stains and painted on faux stripes (inspired by Leman plains rifles). modified the trigger guard, installed slotted and pined wedge keys, and touched up the finish on all the metal.
This is the rifle when I got it a few years ago.

And the same rifle now. (mouse click the photo to enlarge it I had to up load the photos from two different sources.)


